10 Steps to Planning Your Baby’s First Birthday Party
As your baby’s first birthday approaches, you may start feeling overwhelmed by the idea of planning a party to celebrate this huge milestone for them and for you. Trust me, it’s not something you’ll want to miss and it doesn’t have to be such a daunting task.
The key is to start planning early and with the 10 steps that I’ll be laying out for you, you’ll find that it’s easier to navigate than you think. I’m a classic type A personality, so planning is my default approach to preparing for pretty much everything.
I started planning my son’s first birthday party very early in his first year. I can get a little over-eager when I start thinking about future things that I need to tackle and deep dive into my mental rabbit hole of preparations.
I would suggest giving yourself at least a couple of months from the time you start your planning to the day of the big event.
My mom thought I was crazy when I started talking about my plans for my son’s birthday and everything I was doing to prep for it. She was wondering why I was going through all the trouble of making it such an extravagant celebration.
After all, it was only his first birthday and he wasn’t going to remember it anyway. Which is true, but I would.
He is my first and only child. I’m not planning on having more so I wanted to mark this special date with festivities.
Besides, the party wasn’t just celebrating him, but also my huge accomplishment of successfully making it through the first year of his life with both of us being happy and healthy.
As you moms out there know, this is not an easy feat. The first year comes with so many great new experiences and joys, but it also comes with its plethora of struggles and challenges.
We got through the first year! We made it. I needed to celebrate that.
This post may contain affiliate links. That means if you click and buy, I may receive a small commission (at zero cost to you). Please see my full disclosure policy for details.
Now, I know everyone is not like me and may not feel the need to do it up big. Either way, my 10-step guide will help you to have a basic breakdown of how to plan this party and you can decide for yourself on how big or small you want to make it.
Let’s get this party planning started!
1. Pick the Theme
Every good party starts with a theme. It can be as simple or elaborate as you want to make it.
There are several ideas on Pinterest for fun and cute party theme ideas for your baby’s first birthday. Fun pun ideas that play off the word “one”, Disney character themes, animals, princesses, trucks, etc.
The list is pretty much endless.
I debated on several themes but ultimately decided on the theme ‘monsters’ because there were several cute ideas that I thought of to go with this theme and liked that I could tie it in with Monsters Inc.
Once you’ve chosen the theme, you can move on to the next step…
2. Planning the Guest List & Budget
You might think this is an odd next step. It might feel like you’re jumping the gun a little, but I promise this should be your next step.
You want to get a good idea of the size of your party. It’s likely that not everyone you invite will be able to attend, especially if your party list is on the bigger side, but you’ll want to plan as if they all will.
Your list may include close family and friends or you may decide to spread the love to a bigger group. What will help you to narrow this down is the budget you want to stick to.
The more people you invite, the higher the budget, so try to project how much you are wanting to spend.
This will include things like the decor, food and drinks, party favors, invitations, and step 3…the venue.
3. Picking the Venue
The size of your guest list and your budget will help you decide on what type of venue you will need. Again, the bigger the guest list, the more space you’ll need.
If the space you have at your house will accommodate your guests, this option will be the easiest logistically. You won’t have to travel and prep at another location and can spend as much time as you need to prepare.
If your home is not a good option due to limited space, think about asking a friend or family member who has more room for your event.
Other venue ideas that may include having to expand your budget:
- Your community clubhouse (if you have one of those)
- – This way it’s still close to home and the rental price (if they charge for this or require you to reserve it) is usually pretty reasonable
- A restaurant/hotel
- – This can help with planning and prepping of the food and drinks
- – At a restaurant, you may have to pay for a private dining room area if you want your event to be more private or depending on the size of your party
- – Hotels typically have different-sized event rooms and usually have some kind of catering option
- A park
- – These are also usually pretty reasonable in price or potentially free depending on where
- – You will want to check into their policies for parties and rental options.
- – Check to see if they have a gazebo or covered area with tables and seating that will help to accommodate your guests. This will also help with unplanned rainy weather for your outdoor event.
The convenience of your home is usually the first pick if you’re able to accommodate your guests there, but this also involves adding the cleanup to your agenda.
I’m speaking from personal experience here. I had my son’s first birthday party at our house. My home is not big by any means and my guest list was not small, but I have a nice big backyard and patio that was able to accommodate my guests.
I recommend purchasing some of these handy multi-liner disposable trash cans to help reduce the clean-up and make the disposal process easier.
We were also really lucky that it was such a beautiful day outside. It was in the middle of November in Georgia which is always a hit or miss on whether the weather will cooperate.
Once the venue has been picked/booked, you can move on to the next step… the invitation.
4. Creating the Invitation
The design of your invitation can be as simple or as elaborate as you want to make it. I like to keep the theme of the party and the invitation matching.
Not only does it provide a cohesive experience, but it also helps to let your guests know what to expect. Maybe your theme involves them dressing up or maybe they want to get a present that goes with the theme.
Besides, it’s just cute and I like the symmetry of it.
You can design the invitations yourself if you have the know-how and a free Canva account or some other platform for creating digital content.
You can choose to get them printed by Office Depot, FedEx, Walmart, Shutterfly, etc.
You can also buy pre-designed ones from a department store like Walmart, Target, etc., or online from a website/app like Etsy where you can find digital or physical invitations.
Which brings us to the next step…
5. How to Send Your Invitations and When
Before you decide on the type of invitations you want, you’ll want to decide on how you want to deliver them. You can go the traditional route of mailing them or you can get techy and send them out digitally via email/text.
I went the techy route and used an app called Paperless Post. I created my own design for the invitation on Canva and uploaded it to this app.
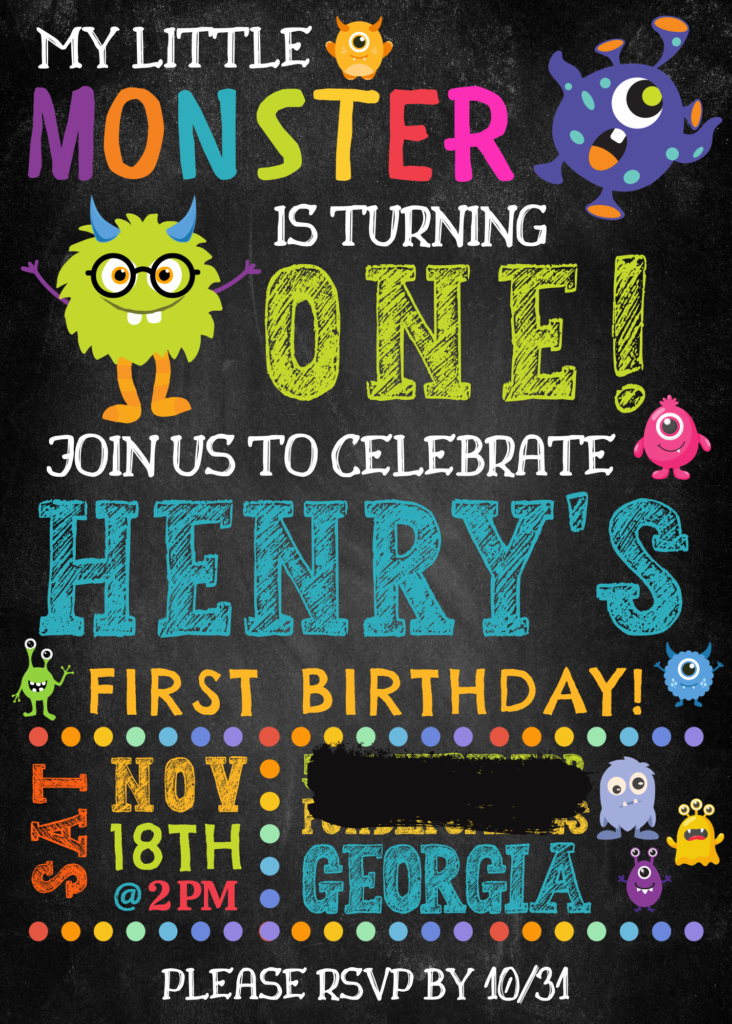
The nifty part about this option is it allows you to choose how you send your invitation by either text or email. It also tracks your RSVPs, allows you to message your guests, and customizes your invitation to include fields like gift registry, party details, links, etc.
The app is free to download, but you pay to deliver the messages by purchasing their coin packages. The amount of coins needed depends on the guest list and certain features you use.
The price is comparable to purchasing invitations and stamps and mailing them, but with the added bonus of the tracking and messaging features which makes it much more convenient and easier to keep track of your guest activity.
You’ll want to send your invites out about 6 weeks prior to the date of the event to give your guests time to plan ahead. Request RSVPs by a date that allows you to plan accordingly for your next step…
6. Planning the Menu
This too can be as simple or elaborate as you’d like. Just make sure you have enough to feed all the hungry mouths.
You can choose to make the food, purchase it premade, or a combo of both. Some great ideas for party food include:
- Small sandwiches
- Chips/Veggies and Dip
- Fruits and Cheeses
- Charcuterie board
- Walking Tacos
- Chick-fil-A nuggets and Mac-n-cheese
- Cookies
- Cupcakes
I like incorporating foods that go with the theme and/or season. For my son’s birthday, I made up some chili for the main food dish since it was the fall.
I had all the fixings for my guests to doctor it up how they liked it. I also had fruits, veggies, dips, crackers, and cheeses for snack food.
For sweets, I made up some marshmallow monster sticks. I put the marshmallows on a cake pop stick, dipped them in colored white chocolate, and put sprinkles and little candy eyeballs on them.
I didn’t feel like making cupcakes from scratch so I ordered some from Publix (a local grocery store chain) and had them frost them with fun colors and I added some of those candy eyes to them to match the theme.
There are so many creative-themed food ideas on Pinterest. After you pick your theme, go take a gander to find some fun ideas for your menu.
7. Smash Cake
I don’t know how long this tradition has been around, but it is the cutest way to have your little one celebrate and the pictures are the best.
Typically you would have a smaller cake for them to enjoy all on their own for this. You can bake this up yourself or get one from a bakery or grocery store.
I don’t really give my son a lot of sweets and up until his first birthday he hadn’t really been exposed to a lot of sugar. I didn’t want him to get an upset tummy for his birthday party so I started searching for alternatives.
I found several healthy smash cake recipes on Pinterest. I picked this one. It looked pretty healthy and sounded yummy. I baked it on up. It was delicious!
I frosted it up with a cream cheese and Greek yogurt frosting. I had planned to get fancy with the frosting and make it look like a furry monster, but the frosting was not the right texture to hold the design I was hoping for.
I added some fun monster eyes, mouth, and horns I bought for decorating cakes to it and voila, it was a healthy little fun masterpiece. He ate close to half of it and threw the other half on the ground for his fur brother to devour.
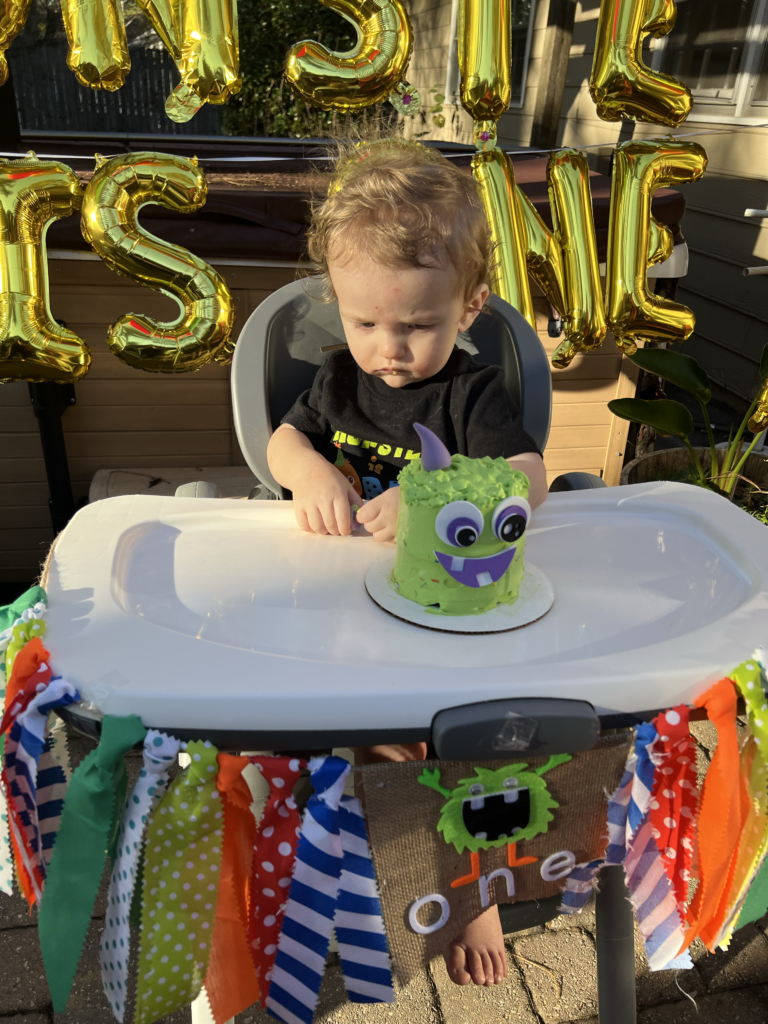
Thankfully, I did that part outside on the back patio in case he made a mess and I’m sure happy I did. If you decide to add this to the birthday fun, be sure to do it in a place that will be easy to clean up after.
8. Party Favors
You’ll want to have a little something for your party-goers to take with them when they leave, especially the kiddos.
This doesn’t have to be anything big, but it’s a great way to thank your guests for coming and send them home with something fun. And if you’re like me, you’ll want it to match your theme.
I found some super cute monster drawstring backpacks and put some adorable little monster squishy toys, small monster notebooks, monster masks, and light-up watches that weren’t spendy and lots of fun. I threw in some of the extra twirly straws I had as well.
Even the adults loved them and since I had several more adults than kids, I encouraged everyone to take one home if they wanted to.
There were still plenty of random party favors left over and I wasn’t sure what to do with them. A friend of mine gave me some wonderful advice for this.
She said to just put them in a plastic bin and with every kid party you throw you can accumulate the leftovers and reuse them for future party favors or have it be a rewards box for your kiddo to pick things from when they accomplish a task or do something that deserves a special treat.
Next, it’s on to the fun part… decorating!
9. Decorating the Venue
Streamers and balloons are a staple for birthday parties and you can definitely stop there, but if you want to have fun with your theme read on.
There are so many great ideas on Pinterest and decorations you can purchase from Amazon, Party City, or one of your local department stores. Or if you’re the crafty type or want to save a little in this area, plenty of DIY ideas.
I’m fairly crafty, but with how busy I was with work, my little one, and getting everything else ready for the party, I chose to buy my decorations.
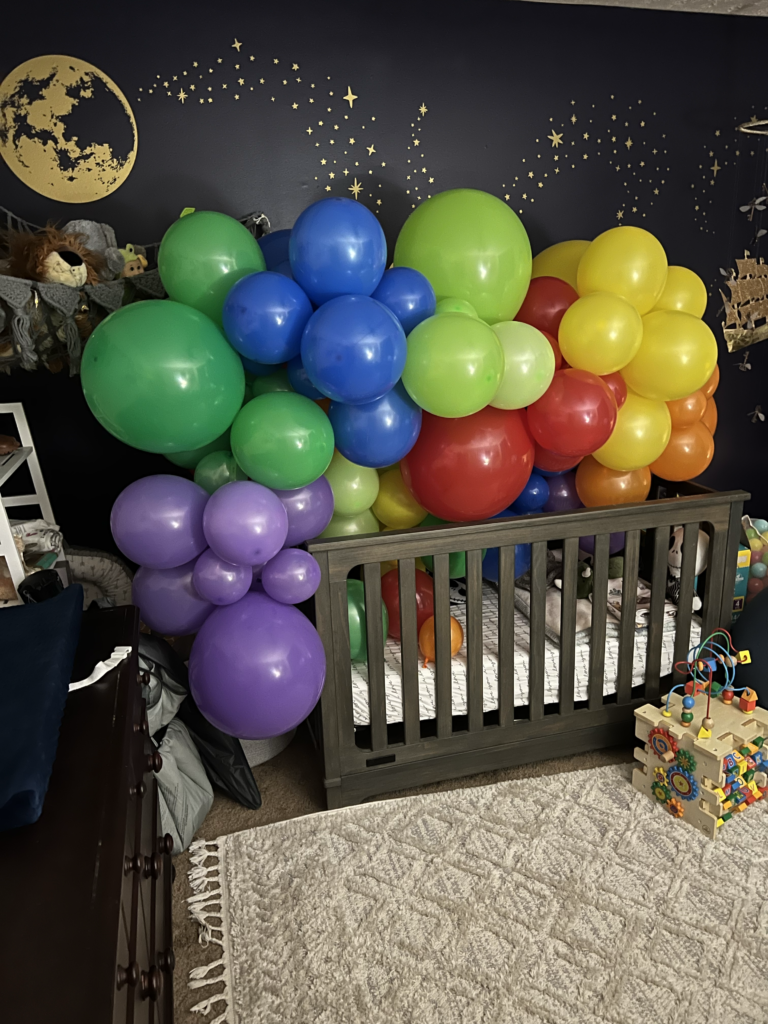
I got some fun hanging monsters with colorful danglers for my house. I purchased a balloon inflation machine (instead of passing out from blowing up all the balloons by mouth) and put together a balloon arch I purchased for my back patio.
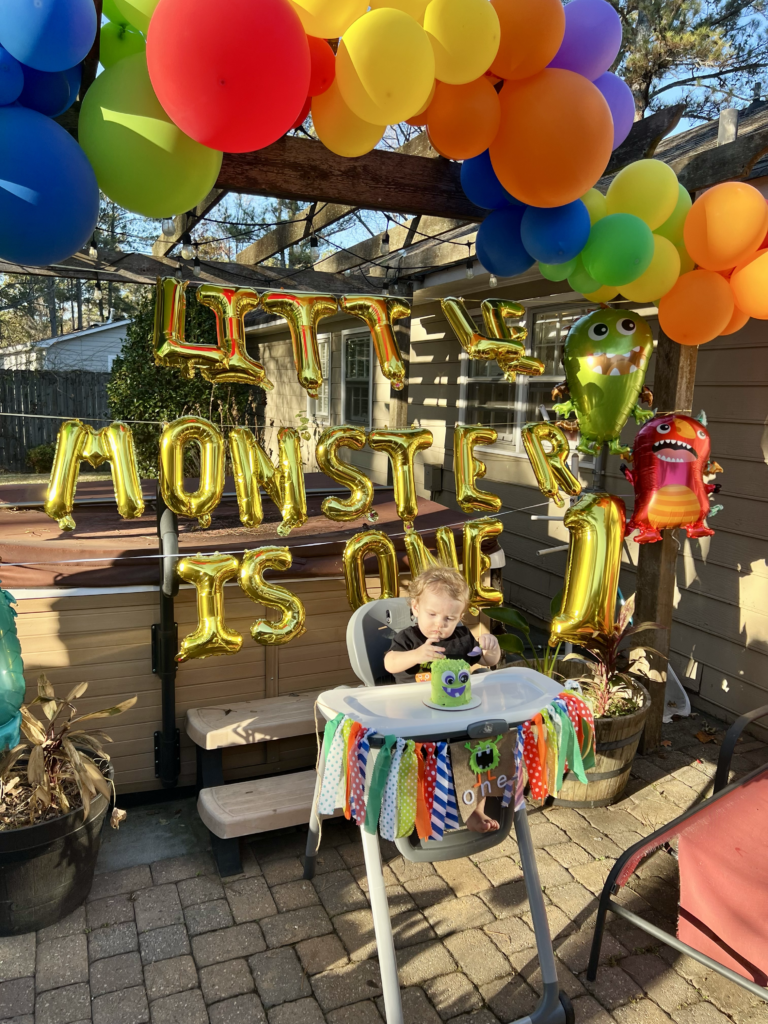
I also got some fun monster balloons and letters that spelled out “Little Monster Is One” to hang below the balloon arch. It turned out very cute and I was happy I went through the madness of putting it together.
I found the cutest colorful twirly straws with monsters on them that were a huge hit. Everyone wanted to take a couple home.
I also bought this cute monster-themed “one” banner to go on the front of his highchair.
I wanted to have photo boards of monsters with their faces cut out so people could take pictures with them but didn’t have the time. Instead, I bought a monster backdrop, cut out some of the faces for a quickie photo booth option, and hung it from my pergola.
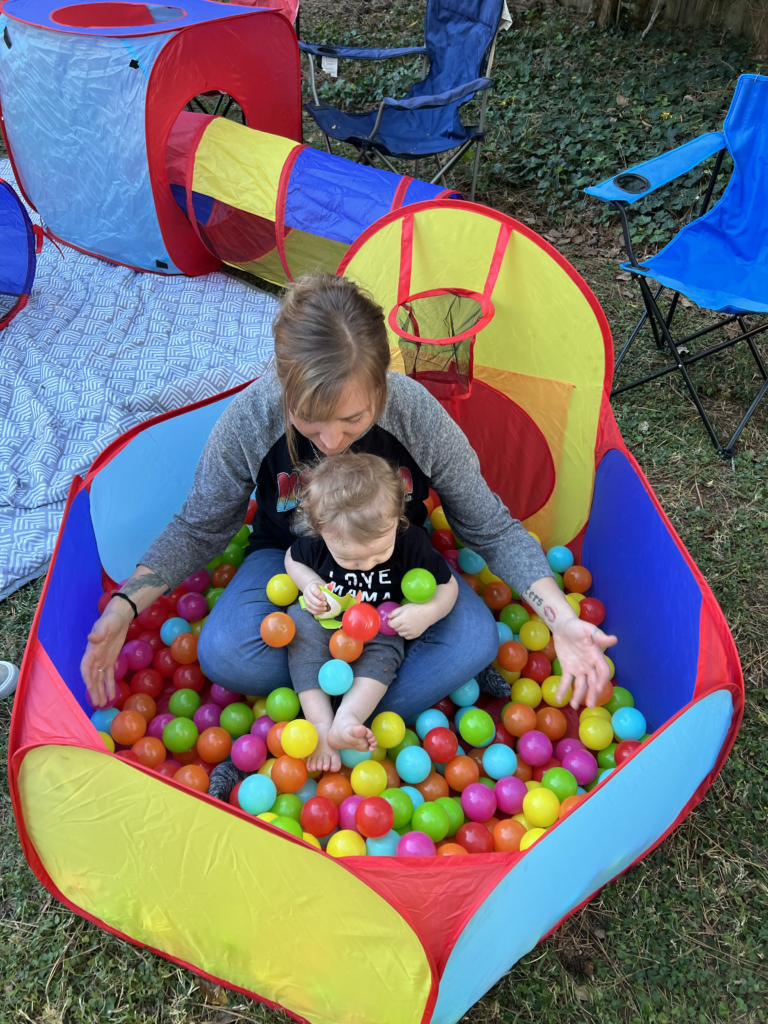
Since there were kids attending, I got a fun pop-up jungle gym that had a ball pit, hoop, and tubes for them to climb through. They had a blast with it and it was easy enough to set up and take down.
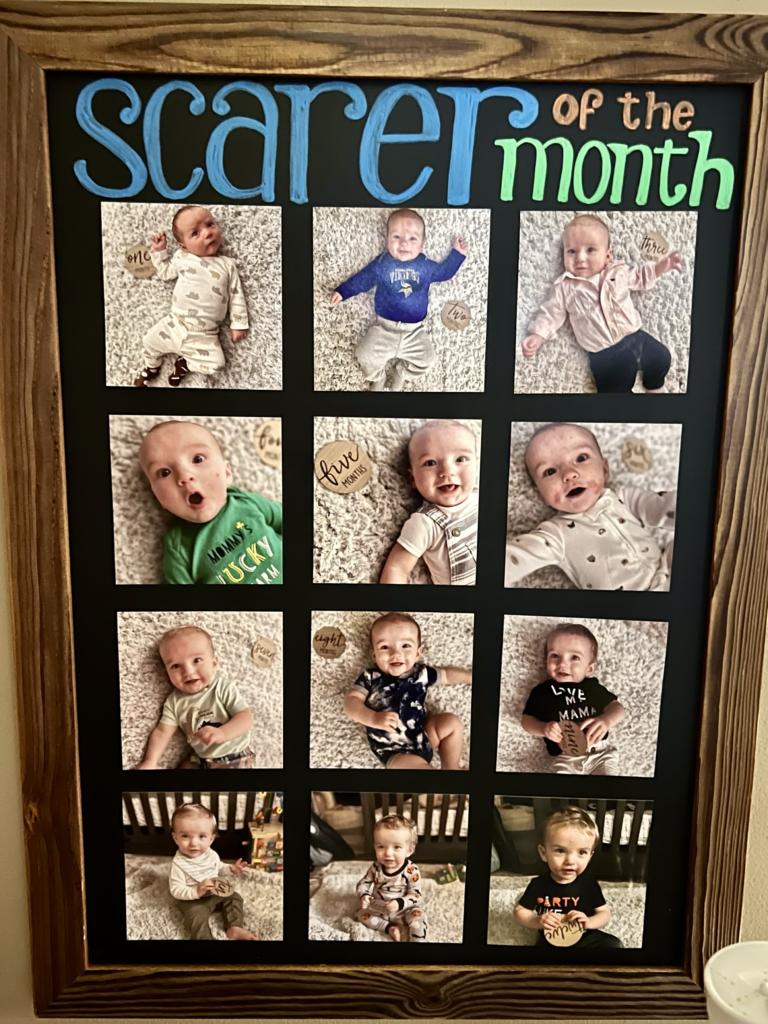
To showcase my little man’s first year of life, I made up a Scarer Of The Month board with a chalkboard and put a milestone picture from each month on it.
Along with that, I printed up about 100 pictures of him from the year and hung them up around my house with twine and mini clothes pins. I left them up for weeks after his party because I loved walking around my house and catching glimpses of my cute little boy at all the different stages of his first year of life.
And last, but not least, I got matching monster-themed birthday shirts for my son and myself. His shirt said ‘This monster is one’ and mine said ‘Mommy’.
I tend to go a little overboard, so if this approach isn’t for you, don’t feel obligated to do this much. You may also want to go bigger than this and that’s absolutely cool too. It’s all up to you.
That takes us to the next step of planning for after the party…
10. Thank You Cards
You’ll want to send out thank you cards to the people who came and were kind enough to bring your little one a gift to celebrate them. Chances are you may not have everyone’s address.
In this day and age, everything has become very digital, so address books aren’t as common anymore.
If you use an app like Paperless Post, you can request addresses from your guests when they respond to your invite, and will store the information for you to access later when you need it.
If you went another route or don’t have all the addresses you need handy, you don’t have to go around calling or texting people for this information.
Instead, let’s kill two birds with one stone. Place the thank you card envelopes on a table by the door of your venue and ask your guests to fill them out with their names and addresses.
That way when it’s time to write out your thank you cards, you won’t have to address them or search for the information because it’s already been done for you.
As your little one opens their gifts, be sure to make a list of who the gifts are from so you don’t have to try and recall when you go to do the thank you cards.
And that’s a wrap! Hope you have fun planning your baby’s first birthday!
Cheers, Warriors!
I hope you enjoyed reading this post and found it entertaining, educational, inspiring—hopefully, all three. Please be sure to leave any comments or questions you have in the Comments section below.
Don’t forget to sign up for my email list and claim your FREE template for Organizing Your Fertility Information that includes documents to track your appointment notes, fertility notes, financial planner, journal page, and more!
